Flashing
Flashing is the process of preparing the memory card with the software needed to run the Solo. Cards can then optionally be “configured” before being plugged into the Solo and turned on.
To prepare a card for use we must:
- download the Solo operating system image (SOSI) onto a PC/Laptop
- unzip it (right click on the downloaded file)
- attach the memory card into your PC/laptop’s memory card reader
- flash the SOSI onto the memory-card
- eject the card safely
- [optionally] configure Solo settings
The card is now ready to be inserted into the slot on the Solo.
Download latest SOSI and unzip
The latest version of the SOS (Solo operating system) is available free from downloads. The download is around 500MB. Using your PC/laptop, save the file (named something like sosi-2016-01-01.zip) onto your desktop.
The downloaded file now needs to be unzipped (uncompressed). Locate the downloaded .zip file on your desktop and right-click. Select “extract” or “unzip”. A file of around 1.2GB called “sosi-2016-01-01.img” should now appear.
Attach Memory Card to PC
Attach the memory card to your PC by inserting it into a card reader. These can either be integrated into your computer, or are available as USB dongles.
Flash the memory card with the SOSI
We now run a program transfers the SOSI onto the memory card. Warning: Simply copying (or drag-and-drop) does NOT work. This process differs depending whether your desktop/laptop is a Windows, Mac or Linux computer - instructions for each are given below.
NOTE: BE VERY CAREFUL. BE VERY VERY CAREFUL. IF YOU GET THIS WRONG YOU MAY LOSE ALL DATA ON YOUR PC/LAPTOP. It is best to ensure you have no other USB memory attached to your pc/laptop, lest you incorrectly overwrite it.
Windows:
You will need the latest SOSI. You’ll also need to download and install the Windows application: Win32DiskImager.
-
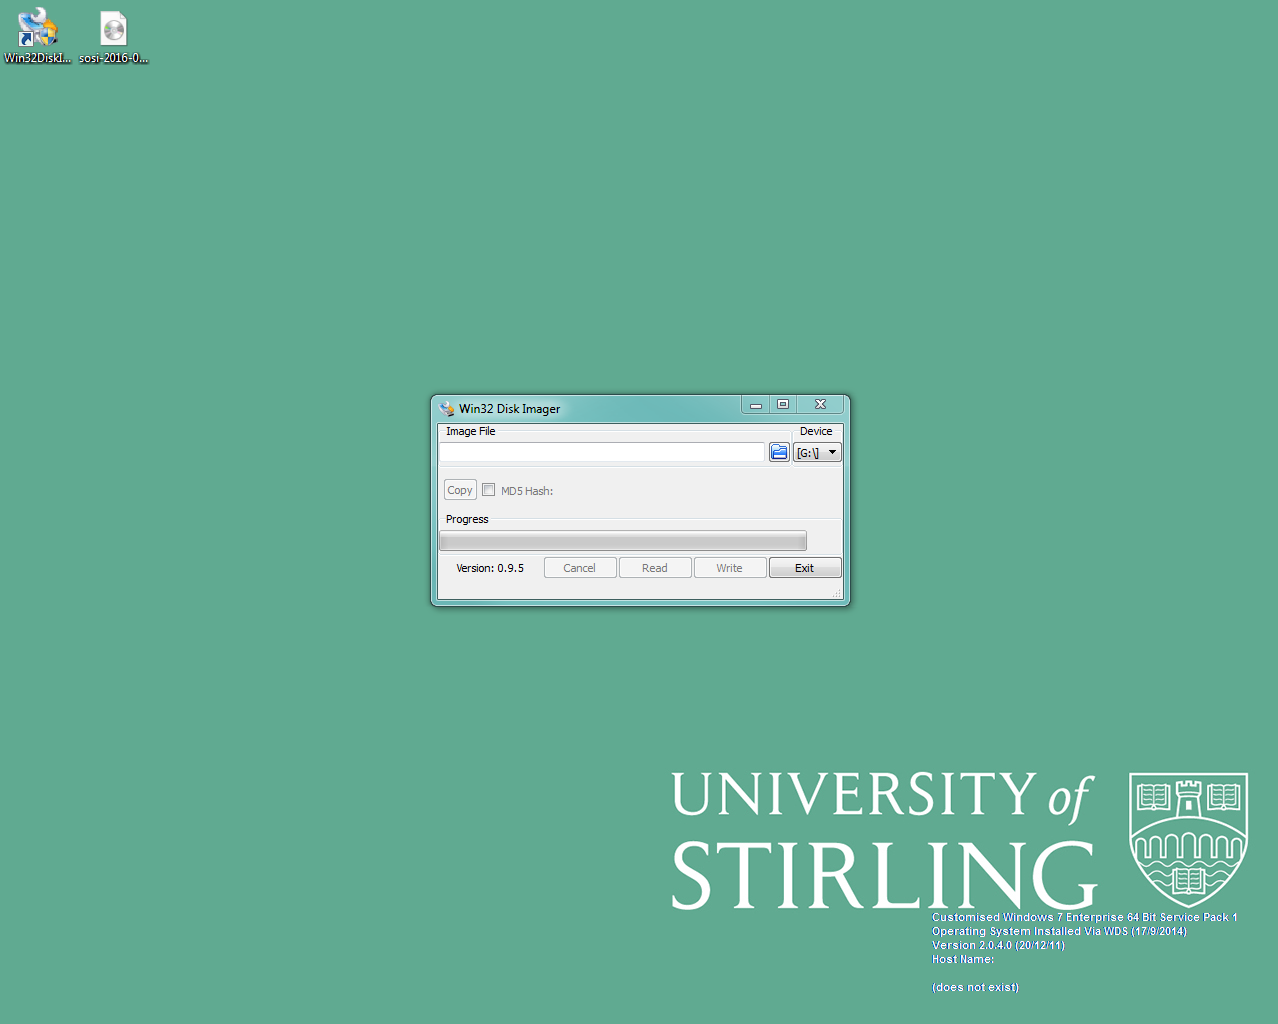
Start the Win32DiskImager application: (you may need to Run as administrator).
-
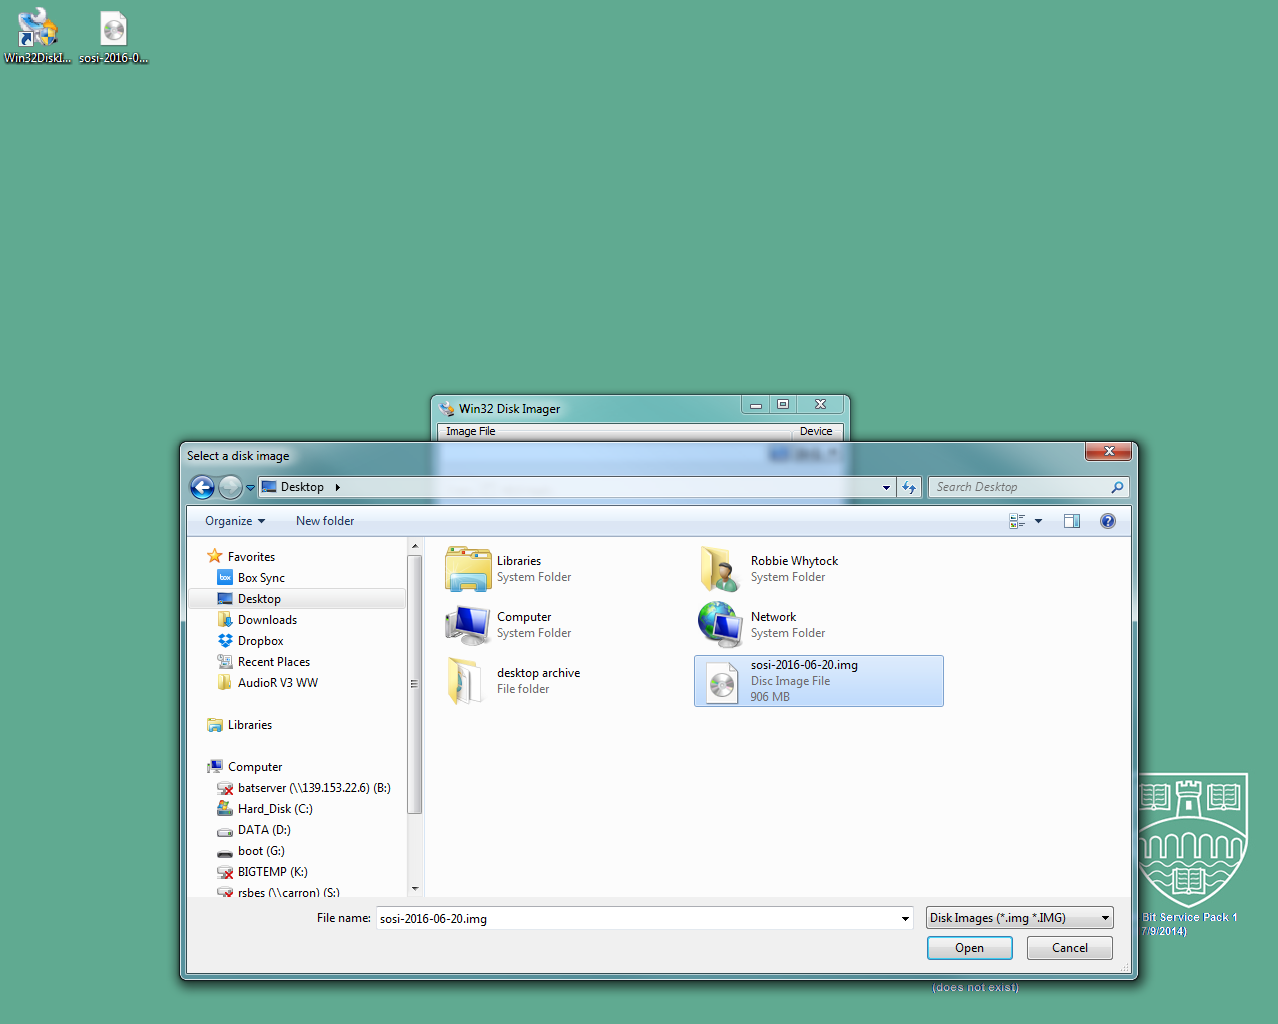
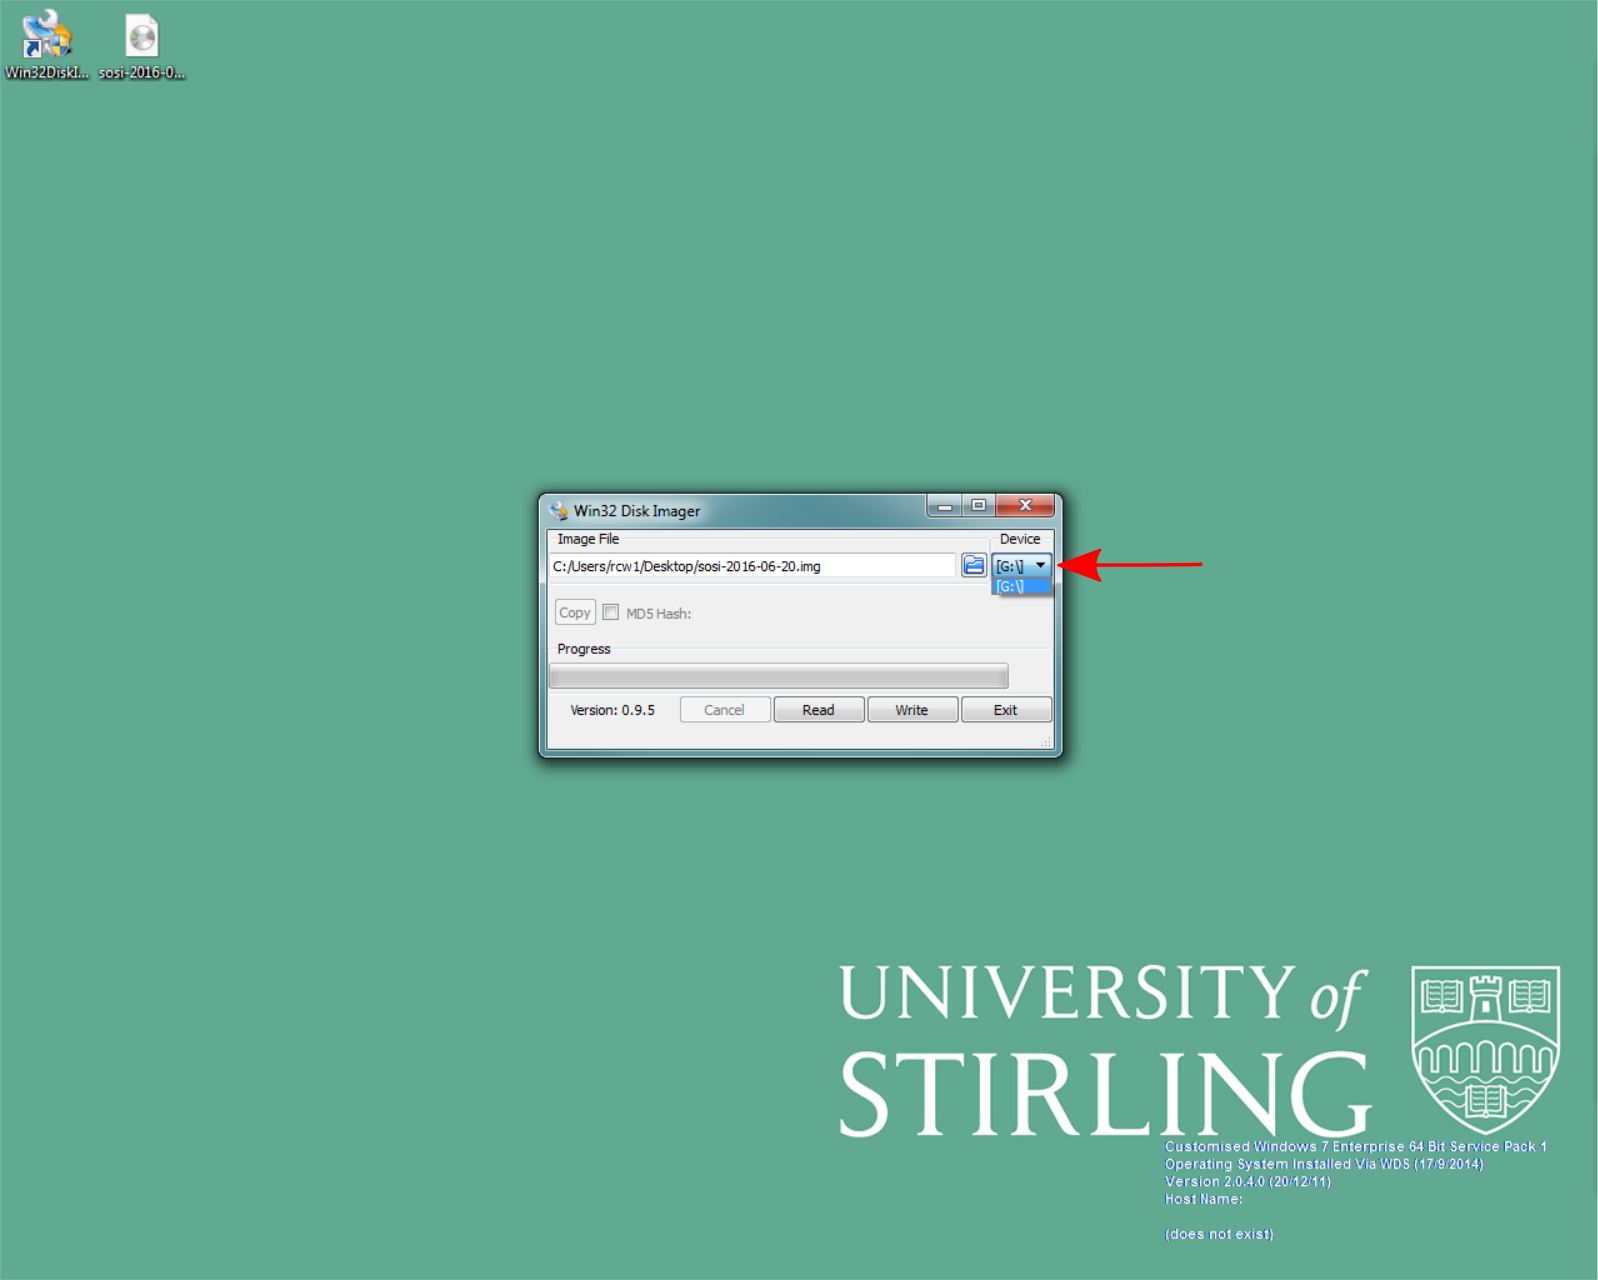
Select the Solo Operating System Image file: -
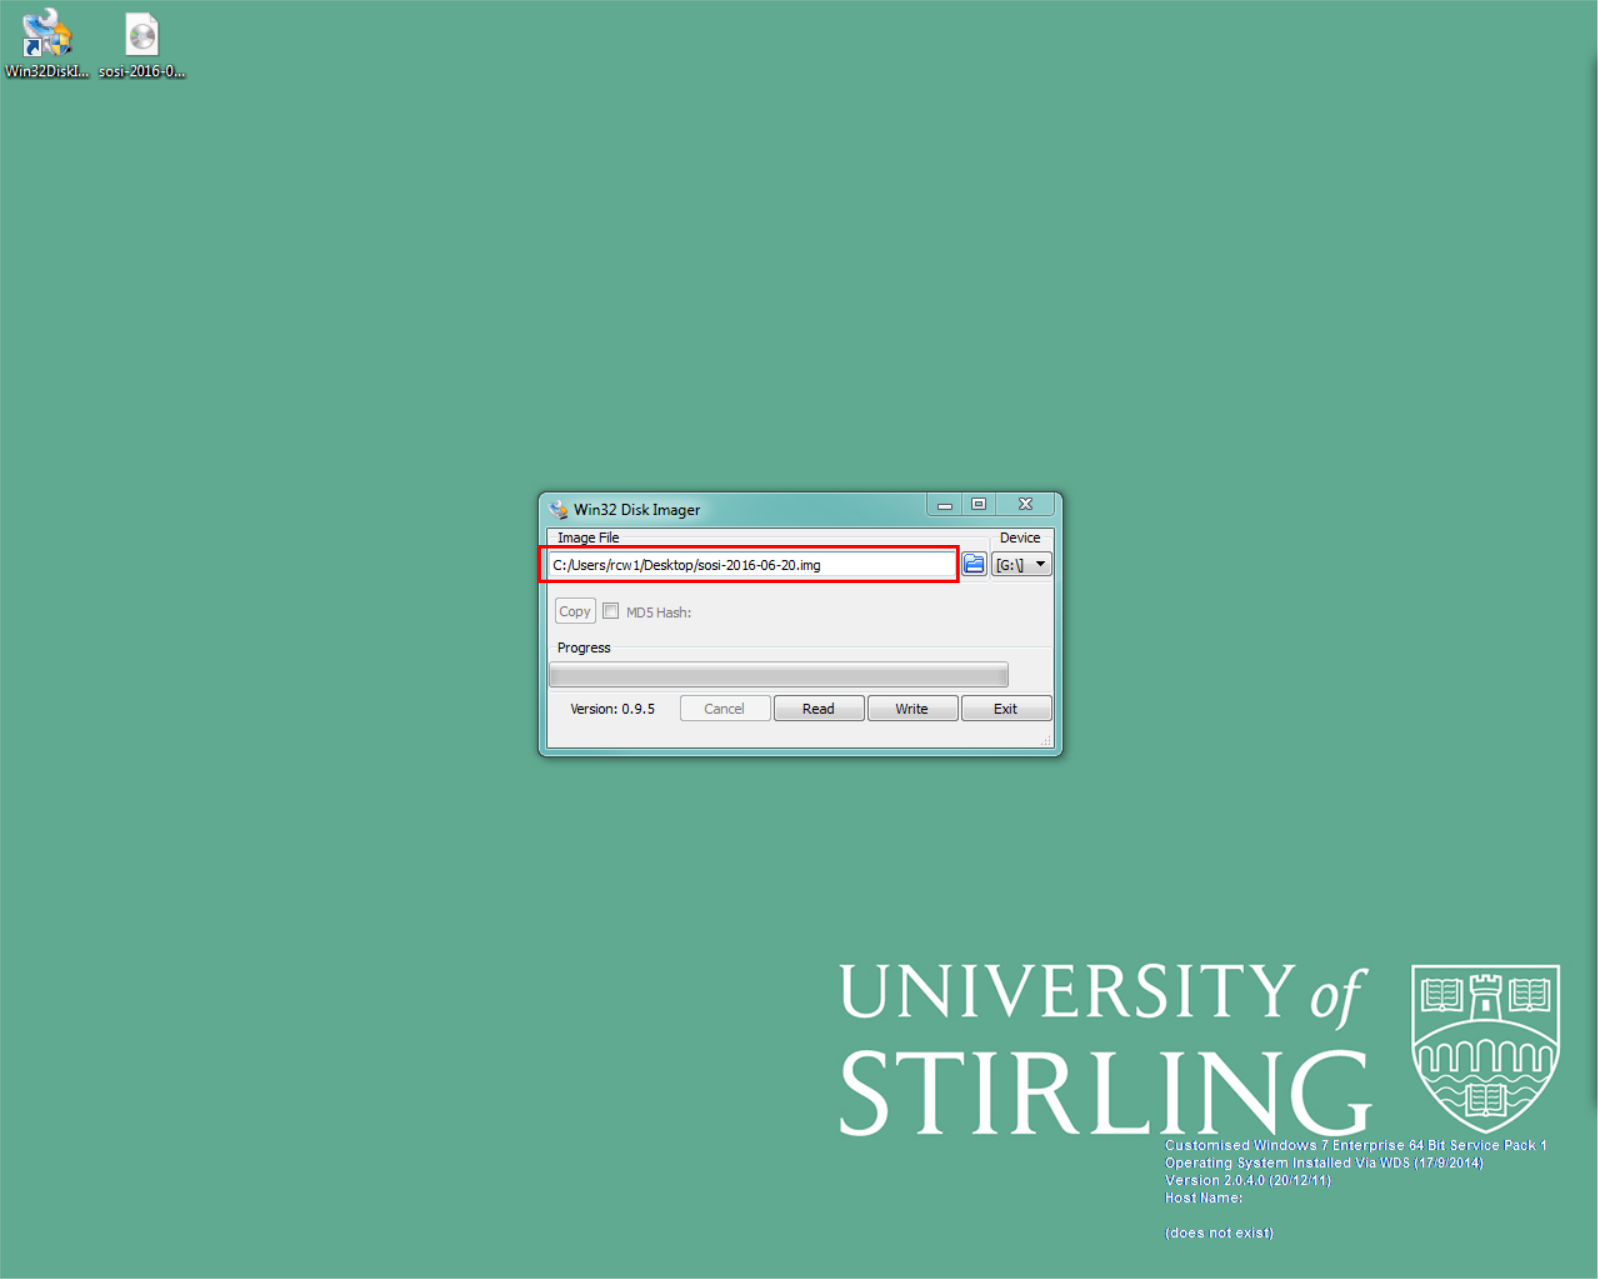
sosi-2016-01-01.imgin the box labeled ‘Image File’ in the Win32DiskImager application.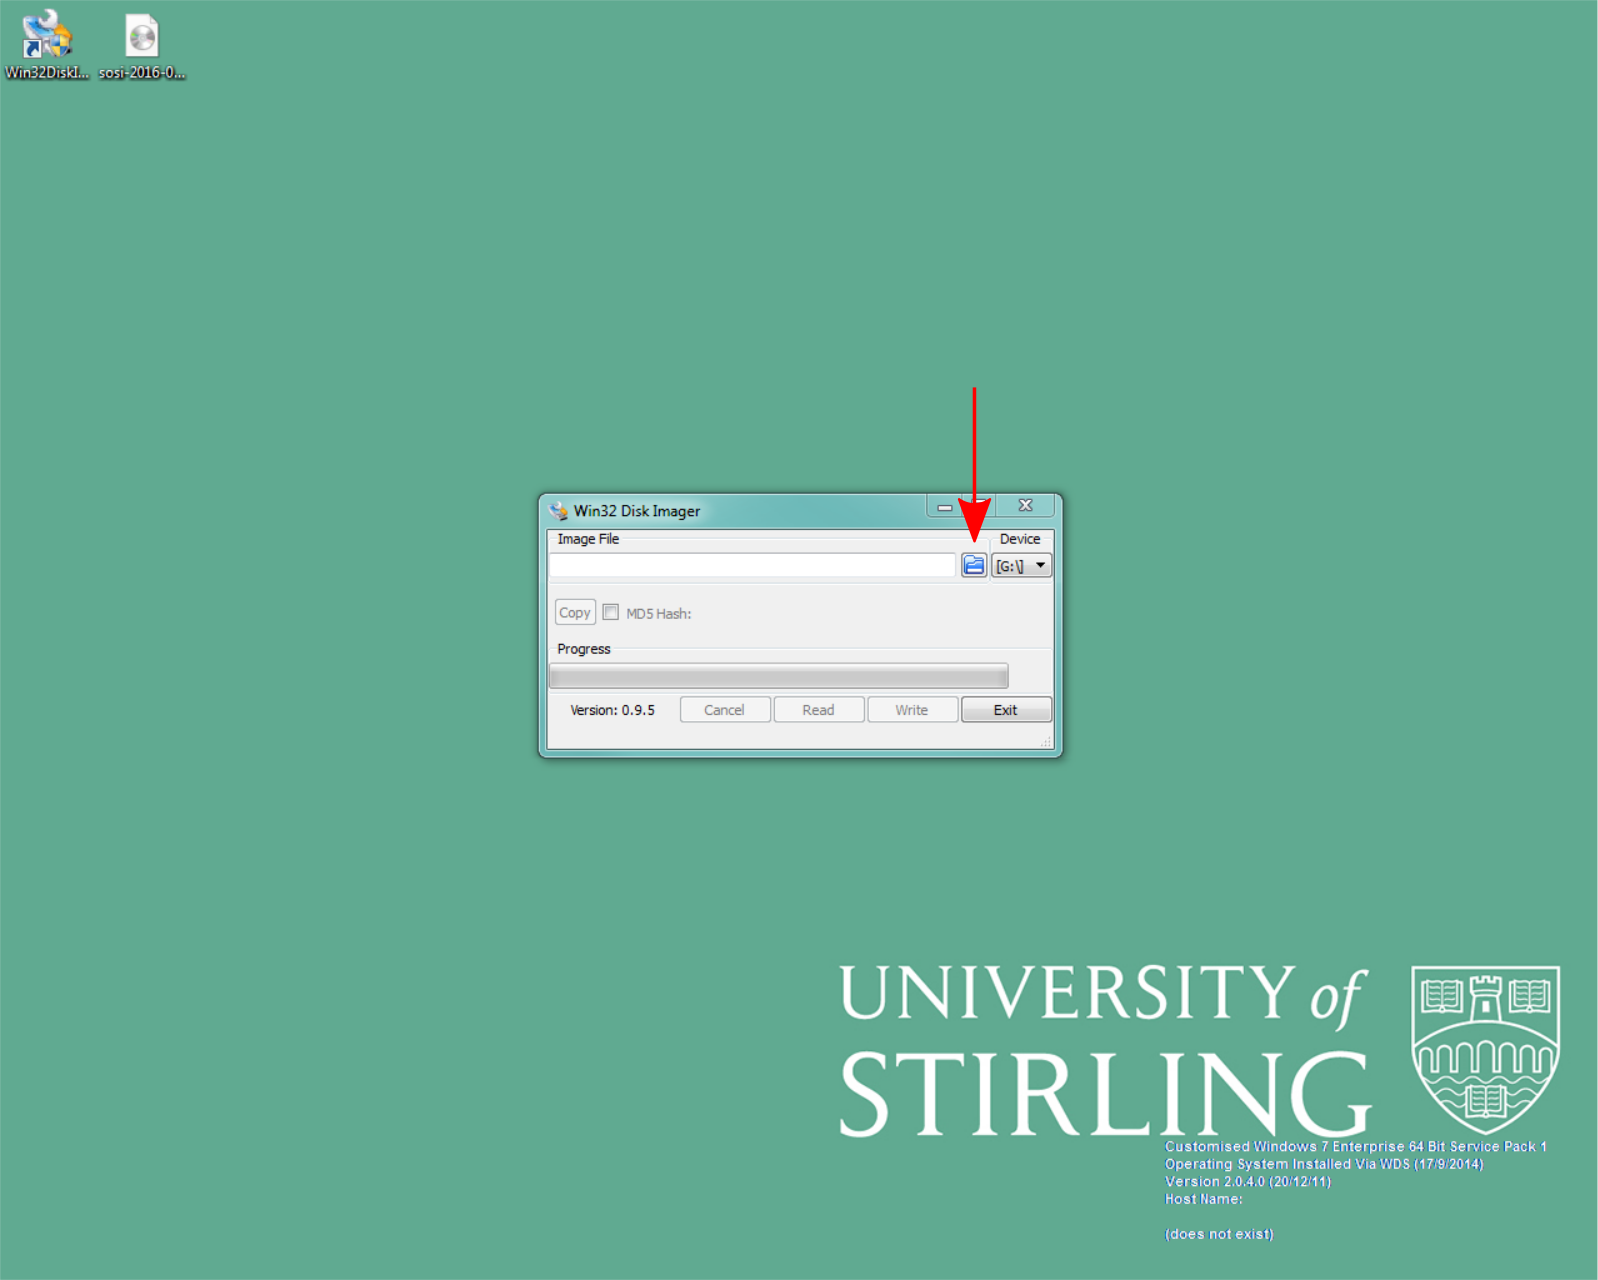
-
Ensure the correct drive letter is selected for the memory card. (GET THIS CORRECT, OR STOP).
-
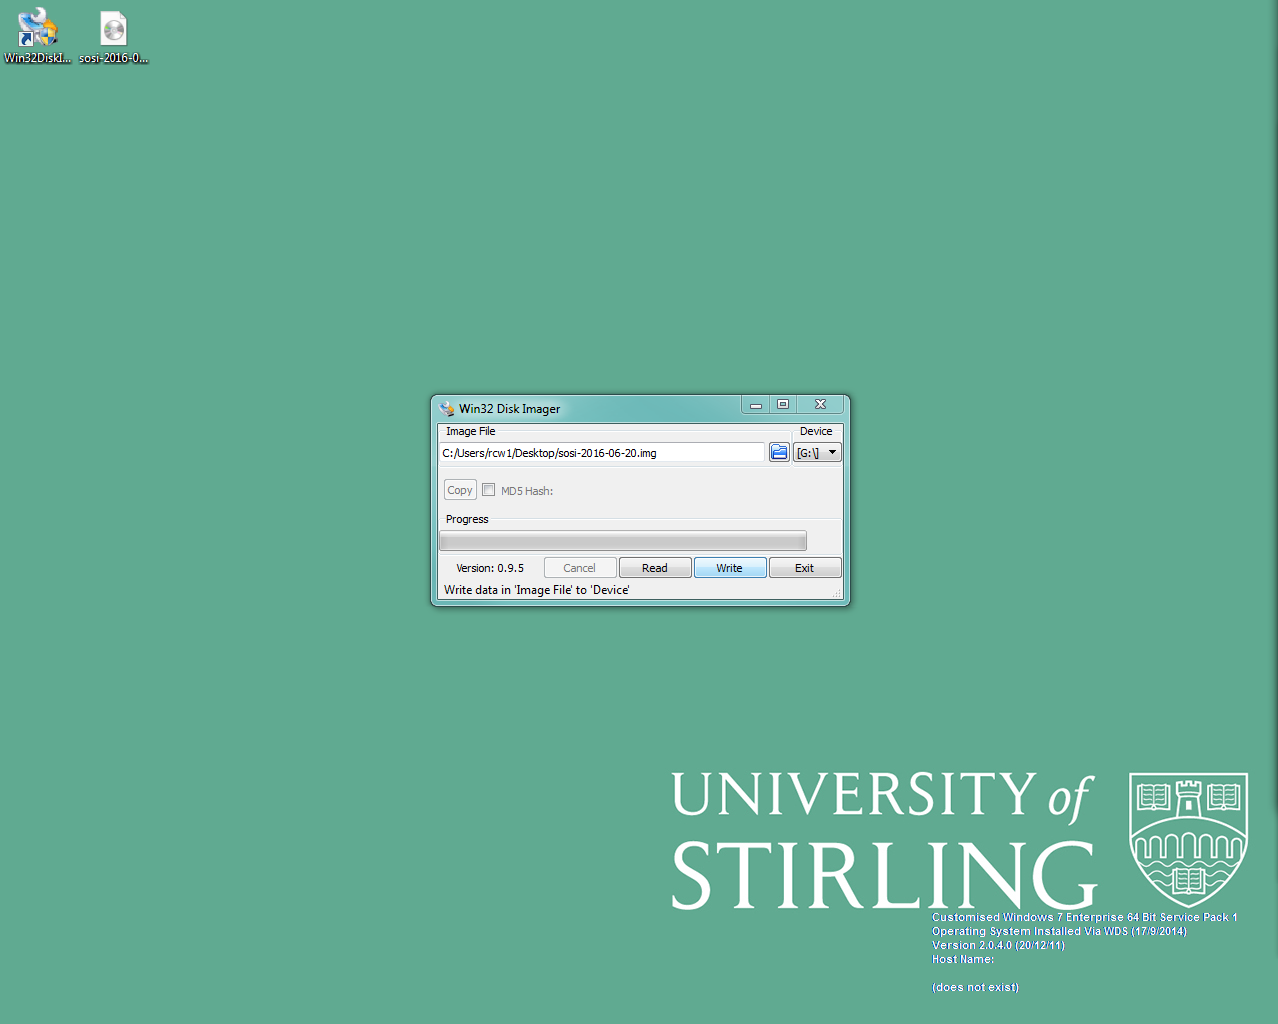
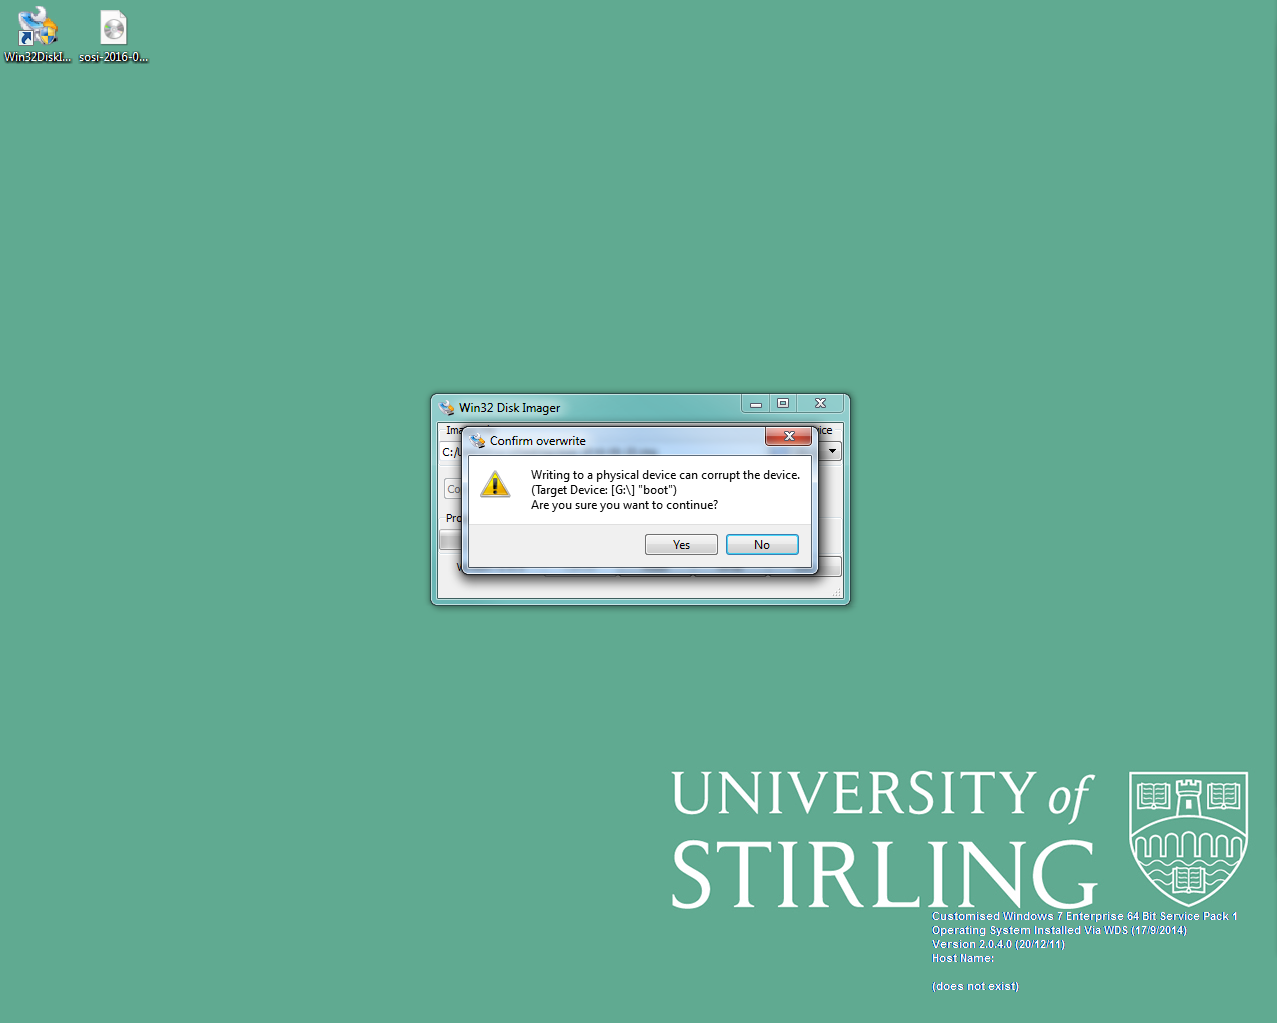
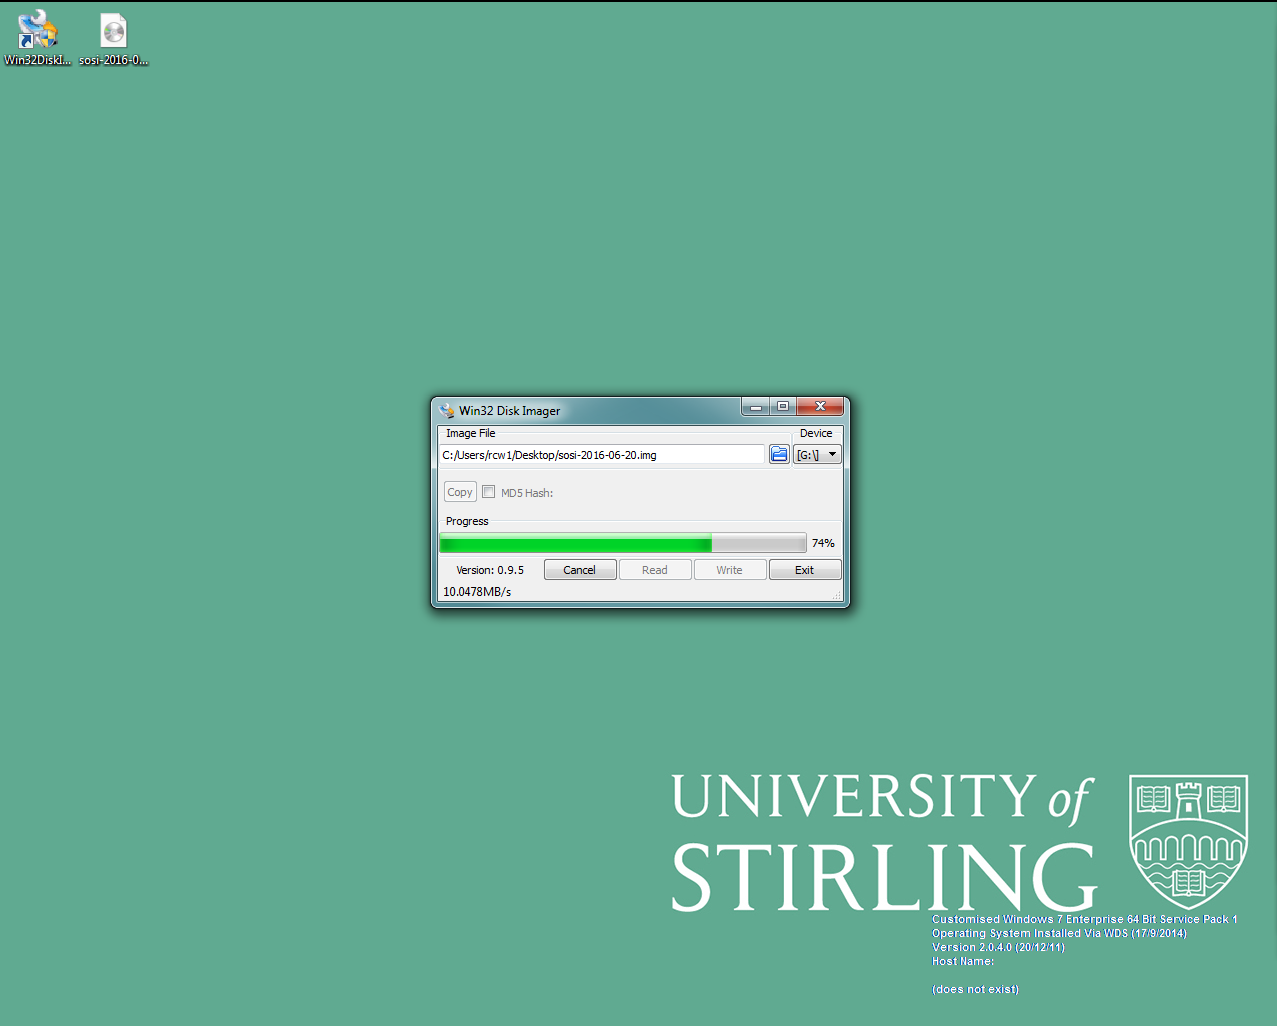
Click on ‘Write’ to start flashing the memory card - the process will take a few minutes.
-
Once the flashing is complete, click on ‘OK’ to complete the process
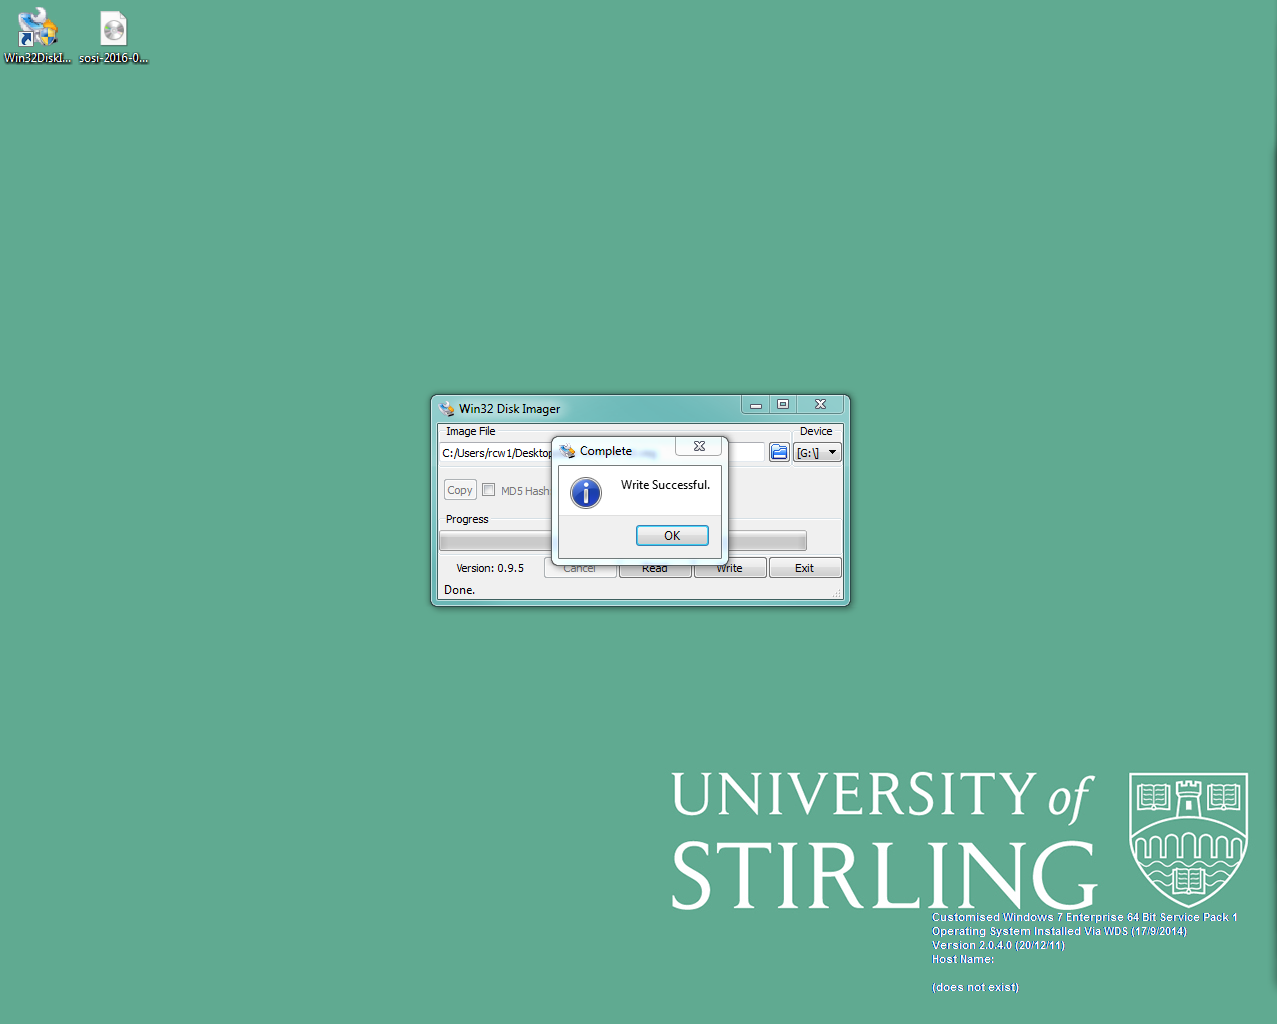
- Eject the card from the system in the usual way
- The card is now ready for use in the Solo.
Mac
I’ve never done it, but others have succeeded (it’s easier than Windows, apparently). Here are the Raspberry Pi foundation’s official flashing instructions for Mac.
Linux
I use “dd” in conjunction with “sudo”. But it’s very dangerous if you don’t know what you are doing. My command line is:
sudo dd bs=40M if=sosi-2016-06-14.img of=/dev/sdX ; sync ; sync
Which reads “as super user, dump the contents of the infile (if=sosi.img) into the output file (of=/dev/sdX) with block size (bs=40M). Then sync the disks to ensure it’s all flush out.”
But if you don’t know what’s going on here, please take care. Here are the Raspberry Pi foundation’s official flashing instructions for Linux.
Finished
The memory card can now be used in the Solo. If you have any problems, more help is available because the process is almost identical to those provided by the Raspberry Pi Foundation, except they aren’t flashing the Solo operating system, obviously.
Configure (optionally)
If you want to change the default configuration options you can do so at this stage - see configuration. The most likely configuration option to set is the timezone. Quick hint: plug the memory card back into your PC and edit the boot/solo/solo.conf file. But you should really read the instructions referenced above.
